Whether you're a seasoned cyclist or a casual rider, installing a kickstand is a practical upgrade that can make your biking experience more convenient and enjoyable. A properly installed kickstand keeps your bike upright, protecting it from damage and making it easier to park anywhere. But how do you ensure a secure and efficient kickstand install? With the right tools, techniques, and guidance, you can perform this task like a pro!
In this guide, we'll walk you through the step-by-step process of a kickstand install, covering everything from choosing the right kickstand for your bike to troubleshooting common issues. We’ll also answer some frequently asked questions to make sure you have all the information you need for a hassle-free installation. Whether you're upgrading your bike or replacing a worn-out kickstand, this comprehensive guide has got you covered.
A kickstand install might seem like a small task, but it plays a big role in maintaining your bike's functionality and longevity. With our easy-to-follow instructions, you'll not only ensure a sturdy installation but also learn tips to enhance the overall performance of your bike. Let’s dive into the details and get started on this essential bike upgrade!
Table of Contents
- Why Install a Kickstand?
- Types of Kickstands
- Tools and Materials Needed
- How to Choose the Right Kickstand?
- Step-by-Step Kickstand Installation Guide
- How to Adjust Your Kickstand?
- Common Mistakes to Avoid
- How to Maintain Your Kickstand?
- Can You Install a Kickstand on Any Bike?
- Do I Need Professional Help?
- How Do Kickstands Affect Bike Performance?
- Troubleshooting Kickstand Issues
- Frequently Asked Questions
- Conclusion
Why Install a Kickstand?
A kickstand is a crucial accessory that enhances the utility of your bike by keeping it upright when parked. This not only prevents scratches and damages but also makes it easier to store and access. Here are some key reasons why kickstand installation is worth considering:
- Improved bike stability, especially on uneven surfaces.
- Convenience for quick stops during rides.
- Reduced wear and tear on your bike caused by leaning it against walls or laying it on the ground.
Installing a kickstand is a small investment that yields significant benefits, particularly for commuters, recreational cyclists, and anyone who frequently parks their bike outdoors.
Types of Kickstands
Before diving into the installation process, it’s essential to understand the various types of kickstands available in the market. Each type has its advantages and is suited for specific bikes and riding styles:
1. Side-Mount Kickstands
These are the most common type of kickstands, mounted on the side of the bike’s frame. They are ideal for lightweight bikes and casual riders.
2. Center-Mount Kickstands
Center-mount kickstands attach to the middle of the bike frame and provide better stability for heavier bikes, such as touring bikes or e-bikes.
3. Double-Leg Kickstands
Perfect for cargo bikes or bikes with heavy loads, double-leg kickstands offer superior balance by supporting the bike on both sides.
4. Adjustable Kickstands
These versatile kickstands allow you to modify the length to suit different bike sizes, making them a popular choice for those with multiple bikes.
Tools and Materials Needed
Before you begin your kickstand install, gather the following tools and materials to ensure a smooth process:
- A new kickstand compatible with your bike
- Allen wrench or screwdriver (depending on your kickstand model)
- Torque wrench
- Measuring tape
- Bicycle grease
How to Choose the Right Kickstand?
When selecting a kickstand, consider these factors to ensure the best fit for your bike:
1. Bike Type
Determine whether your bike is a road bike, mountain bike, or commuter bike, as certain kickstands are better suited for specific designs.
2. Frame Material
Ensure that the kickstand is compatible with your bike's frame material (aluminum, carbon fiber, or steel) to avoid damage during installation.
3. Weight Capacity
Choose a kickstand that can support your bike’s weight, especially if you often carry heavy loads or accessories.
4. Adjustability
If you plan to use the kickstand on multiple bikes, an adjustable model is your best bet for versatility.
Step-by-Step Kickstand Installation Guide
Follow these detailed steps to install your kickstand securely:
- Position your bike on a stable surface and ensure it’s upright.
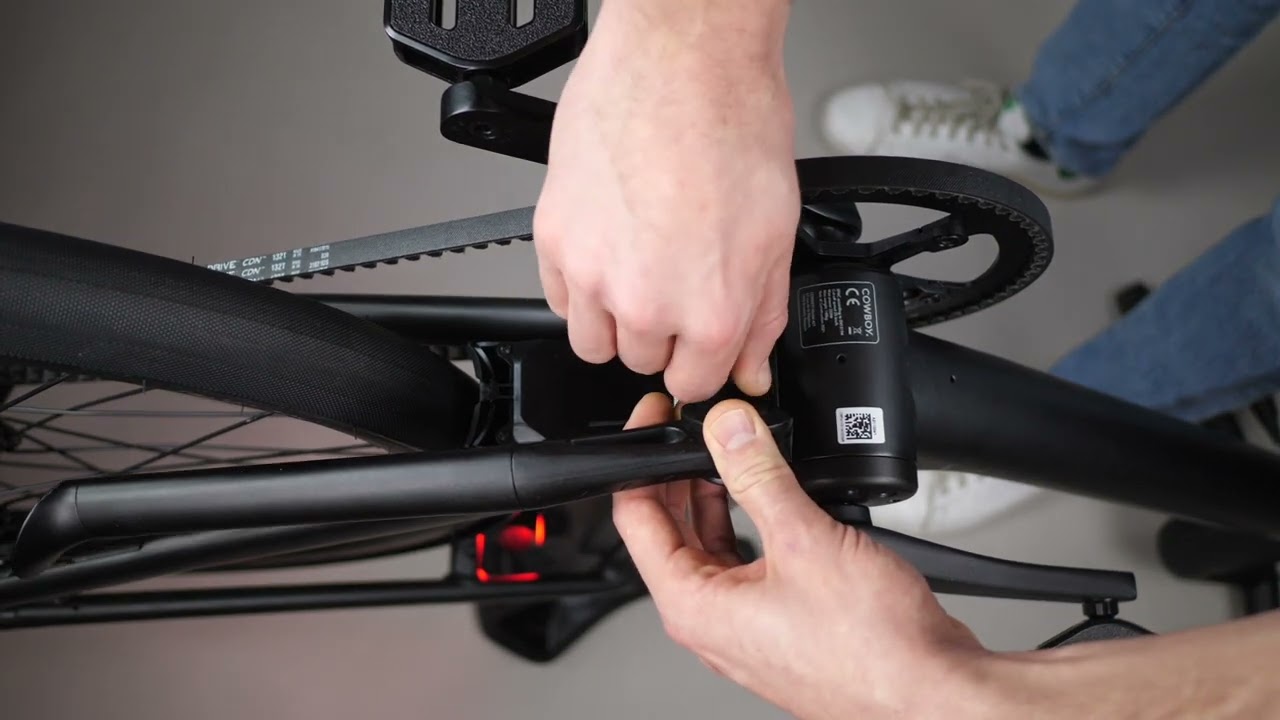
- Identify the mounting point on your bike frame.
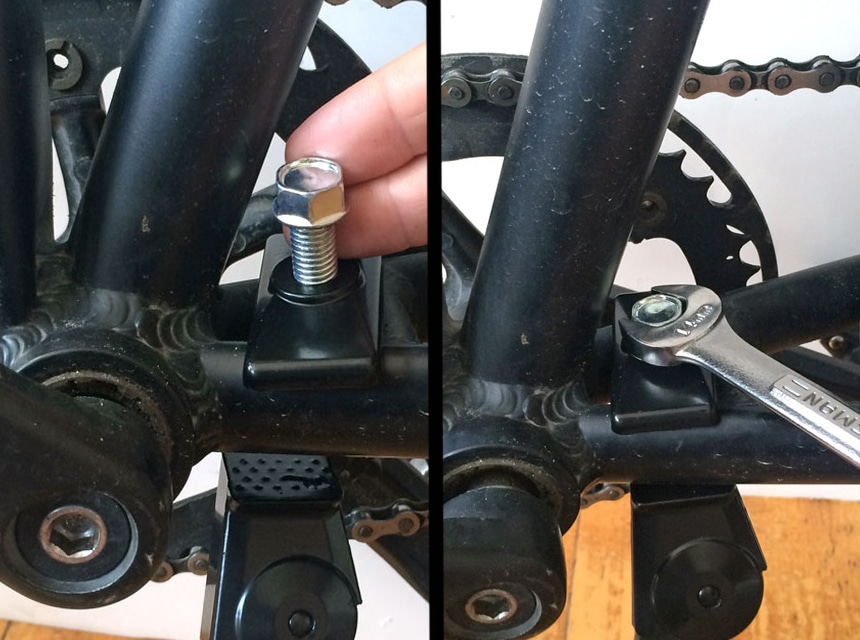
- Attach the kickstand bracket, aligning it with the mounting point.
- Use the Allen wrench or screwdriver to secure the kickstand tightly.
- Adjust the kickstand length to ensure your bike stands at the correct angle.
- Test the stability of the kickstand by parking your bike on various surfaces.
How to Adjust Your Kickstand?
Sometimes, a newly installed kickstand may need adjustments to function optimally. Here’s how to do it:
- Loosen the adjustment screw on the kickstand.
- Slide the kickstand to the desired length.
- Tighten the screw to lock the adjustment in place.
Common Mistakes to Avoid
During kickstand installation, avoid these common pitfalls:
- Over-tightening the bolts, which can damage the bike frame.
- Choosing a kickstand incompatible with your bike’s weight or design.
- Skipping the testing phase after installation.
How to Maintain Your Kickstand?
Proper maintenance ensures the longevity and performance of your kickstand:
- Regularly clean the kickstand to remove dirt and debris.
- Lubricate the pivot points to prevent rust and ensure smooth movement.
- Inspect the bolts periodically to ensure they remain tight.
Can You Install a Kickstand on Any Bike?
While most bikes can accommodate a kickstand, some high-performance models like carbon-fiber road bikes may not have mounting points. In such cases, consider clamp-on kickstands that don’t require frame drilling or modifications.
Do I Need Professional Help?
A kickstand install is a straightforward DIY task for most bike owners. However, if you’re unsure about compatibility or lack the necessary tools, seeking professional assistance ensures a secure and damage-free installation.
How Do Kickstands Affect Bike Performance?
When installed correctly, a kickstand has minimal impact on bike performance. However, improper installation or an incompatible kickstand can affect weight distribution and stability, particularly during rides.
Troubleshooting Kickstand Issues
If your kickstand isn’t functioning as expected, consider these fixes:
- Check for loose bolts and tighten them if necessary.
- Ensure the kickstand is adjusted to the correct length.
- Inspect for rust or dirt buildup that may hinder movement.
Frequently Asked Questions
1. Can I install a kickstand on a carbon bike?
Yes, but use a clamp-on kickstand to avoid drilling into the frame.
2. How do I choose the right kickstand size?
Measure your bike frame and wheel size to select a compatible kickstand.
3. Are kickstands universally adjustable?
No, some models are fixed in length, while others offer adjustability.
4. Can I install a kickstand without a mounting point?
Yes, clamp-on kickstands can be attached to bikes without dedicated mounting points.
5. How often should I maintain my kickstand?
Inspect and clean it every few months to ensure optimal performance.
6. Do kickstands add significant weight to a bike?
No, most kickstands are lightweight and have minimal impact on overall bike weight.
Conclusion
A kickstand install is a simple yet impactful upgrade that enhances your bike’s utility and protects it from unnecessary damage. By following this guide, you can confidently choose, install, and maintain a kickstand that suits your needs. Whether you’re a casual rider or a cycling enthusiast, having a reliable kickstand makes your biking experience more convenient and enjoyable. So, gather your tools, pick the perfect kickstand, and give your bike the stability it deserves!